Introduction
In today's network infrastructure, security is paramount. Secure access to routers and switches is essential to ensure that sensitive network configurations and data remain protected. One of the most common methods to secure remote access to networking devices like routers is through the use of Secure Shell (SSH). SSH offers a secure, encrypted connection to a device, eliminating the vulnerabilities that come with older protocols like Telnet.
To configure SSH on a router, a series of commands need to be entered to ensure that the router can accept secure connections from remote administrators. These steps are crucial for establishing a secure connection, and knowing which specific commands must be used can help prevent configuration errors that could compromise your network.
In this blog post, we will explore the necessary commands required to configure SSH on a router and the importance of each configuration step. We will also provide practical, real-world examples and sample questions that network professionals can use to verify their understanding.
Understanding SSH Configuration on Routers
SSH stands as the gold standard for secure remote access. It uses encryption for data transmission and allows administrators to control network devices over the internet securely. However, SSH is not automatically enabled on a router; it requires a series of configurations to function properly.
Before we dive into the commands, let's first review the prerequisites:
-
The router must have a domain name configured. SSH uses the domain name system (DNS) to authenticate communication.
-
The router must have a local username and password configured to authenticate SSH sessions.
-
The router's interface must be configured with an IP address and subnet mask.
Once these prerequisites are completed, SSH configuration can begin.
Step 1: Configure the Hostname
The first command to be used when setting up SSH is configuring the router's hostname. The hostname is crucial because SSH relies on it to perform device identification. It also plays a role in the encryption key generation.
The command to configure the hostname is:
- Router(config)# hostname Router1
In this example,Router1 is the hostname for the router. Make sure to choose a unique name that helps identify the router within your network.
Step 2: Configure the Domain Name
After setting the hostname, you need to configure a domain name. SSH uses this domain name when generating encryption keys, so it's essential that this step is performed correctly.
The command to configure the domain name is:
- Router1(config)# ip domain-name dumpsarena.co
In this case, the domain name is dumpsarena.co, which you should replace with your actual domain name.
Step 3: Generate the RSA Keys
With the hostname and domain name configured, the next step is to generate the RSA keys, which SSH will use to encrypt the data. RSA key pairs consist of a public and private key, ensuring that the communication between the client and the router is encrypted.
To generate the RSA keys, use the following command:
- Router1(config)# crypto key generate rsa
When prompted, enter the key modulus size. A common choice is 2048 bits, as it strikes a balance between security and performance.
How many bits in the modulus [512]: 2048
After the keys are generated, the router is ready to accept SSH connections.
Step 4: Enable SSH Version 2
By default, routers may enable SSH Version 1, which is considered insecure due to various vulnerabilities. It is highly recommended to use SSH Version 2, which provides stronger security. To enable SSH Version 2, use the following command:
- Router1(config)# ip ssh version 2
Enabling Version 2 ensures that the router will use the more secure encryption algorithms and authentication methods available.
Step 5: Configure the VTY Lines for SSH Access
Virtual Terminal (VTY) lines allow remote access to the router. To configure SSH access, you need to set up the VTY lines for SSH access by using the following command:
- Router1(config)# line vty 0 4
This command configures the first five VTY lines, which correspond to the first five possible SSH connections. Once you're in the VTY line configuration mode, you can apply settings such as authentication methods and access control.
Step 6: Set the Login Method for SSH
Next, you must specify the login method for the VTY lines. Typically, you'll use the local user database for authentication. This is done by the following command:
- Router1(config-line)# login local
This command tells the router to use the local user database for authentication. Before this command works, you must configure a local username and password.
Step 7: Configure the Username and Password for Authentication
Before SSH connections can be authenticated, you need to configure a username and password. This is done using the following command:
- Router1(config)# username admin privilege 15 secret admin123
Here, admin is the username, and admin123 is the secret password. The privilege 15 setting ensures that this user has administrative privileges.
Step 8: Allow SSH Access to Specific IP Addresses (Optional)
In some cases, you may want to restrict SSH access to specific IP addresses for added security. This can be done using an access control list (ACL). To create an ACL, use the following commands:
- Router1(config)# access-list 10 permit 192.168.1.0 0.0.0.255
- Router1(config)# line vty 0 4
- Router1(config-line)# access-class 10 in
This example only allows devices on the 192.168.1.0/24 network to access the router via SSH.
Step 9: Verify the SSH Configuration
Once all the steps have been completed, it’s important to verify that the SSH configuration is correct. You can use the following commands to verify SSH status:
- Router1# show ip ssh
- Router1# show running-config | include ssh
The first command shows the SSH configuration status, including the version in use, while the second command checks the running configuration for SSH-related entries.
Step 10: Test the SSH Connection
After completing the configuration, it's essential to test the SSH connection from a remote machine. Use a terminal program like PuTTY or a command-line tool such as OpenSSH to attempt an SSH connection to the router.
- ssh admin@192.168.1.1
If everything is configured correctly, you will be prompted to enter the password for the admin user, and once authenticated, you'll have secure remote access to the router.
Conclusion
Configuring SSH on a router is a crucial step for network administrators to ensure secure remote access to devices. By following the necessary commands for setting the hostname, domain name, generating RSA keys, enabling SSH Version 2, and configuring authentication methods, administrators can significantly improve the security of their network devices. With the proper configuration in place, SSH offers a robust solution for secure device management.
At DumpsArena, we understand the importance of mastering the configuration of network devices for certification exams and real-world scenarios. By practicing with real-world examples and staying up-to-date with the latest configurations, you can ensure success in your network certifications and be well-prepared for professional challenges.
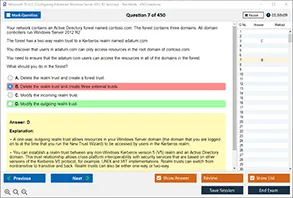
1.What is the first step in configuring SSH on a Cisco router?
a) Generate RSA keys
b) Set up the hostname
c) Configure VTY lines
d) Set the domain name
2.Which command is used to configure a domain name on a Cisco router?
a) ip domain-name
b) hostname
c) crypto key generate rsa
d) line vty 0 4
3.What is the purpose of the crypto key generate rsa command?
a) To enable SSH
b) To generate encryption keys for SSH
c) To configure the router’s IP address
d) To set up user authentication
4.Which command enables SSH Version 2 on a Cisco router?
a) ip ssh version 1
b) ip ssh version 2
c) enable ssh
d) crypto ssh version 2
5.What is the purpose of the line vty 0 4 command?
a) To configure the console line
b) To configure virtual terminal (VTY) lines for remote access
c) To enable SSH
d) To set the router’s password
6.Which command allows you to configure SSH login authentication using the local user database?
a) username admin privilege 15 secret password
b) login local
c) enable secret password
d) ip ssh version 2
7.Which type of encryption key is generated with the crypto key generate rsa command?
a) AES
b) DES
c) RSA
d) 3DES
8.What is the minimum RSA key size recommended for SSH configuration?
a) 512 bits
b) 1024 bits
c) 2048 bits
d) 4096 bits
9.What command should be used to verify SSH configuration on a Cisco router?
a) show ssh
b) show running-config
c) show ip ssh
d) show version
10Which command restricts SSH access to a specific IP address range?
a) ip access-list
b) access-list
c) access-class
d) ip access-group
Visit DumpsArena for the latest CCNA 200-301 Exam Dumps, study materials, and practice tests to guarantee your certification success! Get access to real exam questions and comprehensive resources designed to help you ace your exam.